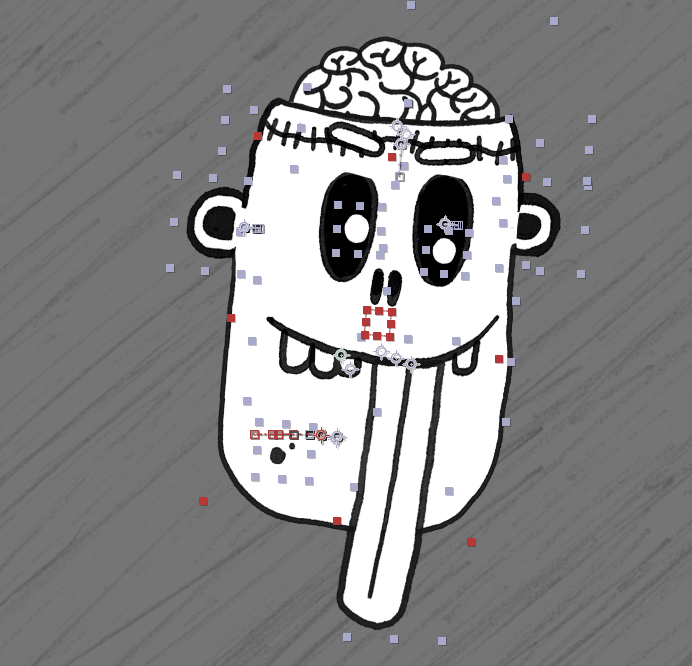
Frankenbro Animation - More 3D Effects for 2D layers in After Effects
Share
Hey, Steefan here, AKA Hippoh! Here's my process for creating frankenbro. You can find all the scripts I used in this tutorial at the bottom of the page.
I started with the artwork in Procreate, exported it as a layered PSD, and brought it into After Effects. Make sure to import as Composition - Retain Layer Sizes so you get control over each layer from Procreate.
Just like with my ghost character, I wanted a 3D/parallax effect, so I used the same script to offset layer positions around a central NULL. If you want more on that setup, check out my ghost reel. But this time, I also tried some new techniques:
-
Using Bendio for Bending: On a friend's recommendation, I tried the Bendio plugin by Animatable. It lets you bend artwork with much cleaner distortion than puppet pins. I then connected the Bendio rotation parameter to my main Null’s rotation and added a script for a short delay and a multiplier. See "Script 1" in the notes at the bottom of the page for the relevant script. This gave frankenbro a cool, floppy tongue that reacts to the master Null’s rotation. I used a similar setup to make the brain wobble in sync!
-
Looping Bobbing Animation: I scripted the position and rotation of the master NULL for a natural, 10-second looping bob. This looks much smoother than using the wiggler and still lets me add sharper left and right movements on top. Consistent bobbing + controlled moves = a nice, smooth animation. See "Script 2" and "Script 3" in the notes at the bottom of the page for the relevant scripts.
-
3D Head Turn Effect: To make the head look like it’s rotating, I masked and animated the ears to tuck behind when the head moves. I also moved the stitches side to side and used the face layer as a mask, so they disappear when the head turns. Same thing with the moles! I even stretched the mouth slightly when it moves near the side of the head. These subtle touches help sell the 3D head turn.
-
Blinking Animation: For the eyes, I used simple masks and animated the mask path to create blinks on cue.
Finally, I added some textures from Grit Kit, applied Turbulent Displace, and set the frame rate to 10fps with Posterize Time for that final look.
Script 1: This script references the rotation of the “MASTER CONTROLLER” layer and applies a delayed rotation effect to the current layer, using a multiplier to control the strength of the rotation. The delay and multiplier create a lagging, amplified motion that follows the MASTER CONTROLLER’s rotation with a half-second delay. This script should be applied to the Rotation parameter of the layer you want to rotate, and "MASTER CONTROLLER" should be replaced with whatever layer name you want to effect the rotation of your layer.
// Reference the parent layer's rotation
var parentRotation = thisComp.layer("MASTER CONTROLLER").transform.rotation;
// Set the multiplier for the rotation effect
var rotationMultiplier = 5.5; // Adjust to make the rotation stronger or weaker
// Set the delay in seconds
var delay = 0.5; // Half a second delay
// Apply the rotation with the delay and multiplier
parentRotation.valueAtTime(time - delay) * rotationMultiplier;
Script 2:This script creates a smooth, looping bobbing effect by applying a sinusoidal oscillation to the layer's y-axis position. The `amplitude` sets the bobbing height, while `frequency` controls the speed, resulting in a gentle up-and-down motion around the layer's original position.
// Amplitude controls the height of the bobbing
var amplitude = 10; // Adjust for desired intensity
// Frequency controls the speed of the bobbing
var frequency = 0.5; // Adjust for slower or faster bobbing
// Original position of the layer
var originalPos = value;
// Apply sinusoidal oscillation on the y-axis
originalPos + [0, amplitude * Math.sin(time * frequency * 2 * Math.PI)];
Script 3: This script applies a delayed, sinusoidal rotation effect to create a subtle tilting motion that synchronises with a bobbing animation. The rotationAmplitude controls the tilt intensity, while frequency matches the bobbing speed, adding a cohesive, natural sway that lags slightly behind the bobbing movement.
// Amplitude of rotation (tilt)
var rotationAmplitude = 5; // Adjust for how much rotation is applied
// Frequency should match the bobbing frequency
var frequency = 0.5; // Same as the bobbing frequency
// Set the delay for the rotation (in seconds)
var delay = 0.3; // Adjust for desired delay after position bobbing
// Sinusoidal rotation with a delay
rotationAmplitude * Math.sin((time - delay) * frequency * 2 * Math.PI);
